

close
Choose Your Site
Global
Social Media

Views: 0 Author: Site Editor Publish Time: 2026-08-29 Origin: Site


Securing cargo is not a matter of guesswork. Load shifts during transit result in severe liability, catastrophic equipment damage, and critical safety hazards. Improper threading, incorrect tensioning, and failing to match strap specifications to load dynamics are the primary causes of tie-down failure. Users frequently struggle with jammed mandrels, webbing degradation, and inadequate anchoring when trying to secure heavy loads for transport on flatbeds or trailers.
This guide provides a technical, step-by-step framework for evaluating, threading, tensioning, and releasing a Ratchet Tie Down. By following these protocols, you ensure compliance with transportation safety standards and mitigate the risks of load failure. You will learn how to select the right hardware, apply mechanical tension correctly, and maintain your equipment for long-term reliability in harsh field conditions.
Working Load Limit (WLL) Dictates Selection: Never select a strap based on Break Strength. The WLL must exceed the weight of the cargo, factoring in dynamic G-forces during transit.
Mandrel Threading is Critical: Webbing must be threaded from the bottom up through the mandrel slot to prevent slippage and jamming under tension.
Hardware Matching Prevents Failure: Selecting the correct end fitting—such as a Double J Hook Ratchet Strap for D-rings or wire hooks for flatbeds—is essential for maintaining tension vectors.
Spool Limits: Wrapping the webbing around the mandrel more than 2 to 3 times creates a "bird's nest," which compromises the locking mechanism and makes release dangerous.
The mechanical core of the system consists of the handle, the slotted mandrel (spool), the release lever (pawl), and the gear cogs. Mechanical advantage multiplies user input into high-tension force. When you pump the handle, the pawl engages the gear cogs, rotating the mandrel and pulling the webbing tight. The locking mechanism holds the tension securely until manually released. Understanding this mechanical interaction helps operators diagnose issues like slipping gears or a jammed release lever in the field.
Heavy-duty ratchets feature wide, ergonomic handles designed to accommodate gloved hands. The gear cogs must remain free of debris to function correctly. A buildup of mud or ice in the gear teeth prevents the pawl from seating fully, which can lead to catastrophic tension loss during transit. Regular inspection of the spring-loaded pawl ensures it snaps firmly into the gear valleys.
Modern transport relies heavily on polyester webbing over nylon. Polyester is the industry standard for a Heavy-Duty Cargo Strap due to its low stretch rate, typically between 1% and 3%. This material resists UV degradation and water absorption, ensuring the strap maintains its structural integrity across diverse weather conditions. Nylon, by contrast, stretches up to 10% under load, making it unsuitable for rigid cargo securement.
Material | Stretch Rate | Water Resistance | Primary Application |
|---|---|---|---|
Polyester | 1% - 3% | High (Does not absorb water) | Heavy-duty cargo securement, flatbeds |
Nylon | 5% - 10% | Low (Absorbs water, loses strength) | Recovery straps, dynamic towing |
Polypropylene | Moderate | High (Floats) | Light-duty marine applications |
Webbing width directly correlates with load capacity. A standard 2-inch strap typically offers a Working Load Limit of 3,333 lbs, while a 4-inch strap can handle up to 5,400 lbs. The weave density also plays a role in abrasion resistance. Tighter weaves withstand friction against cargo edges better than loose weaves, extending the operational lifespan of the equipment.
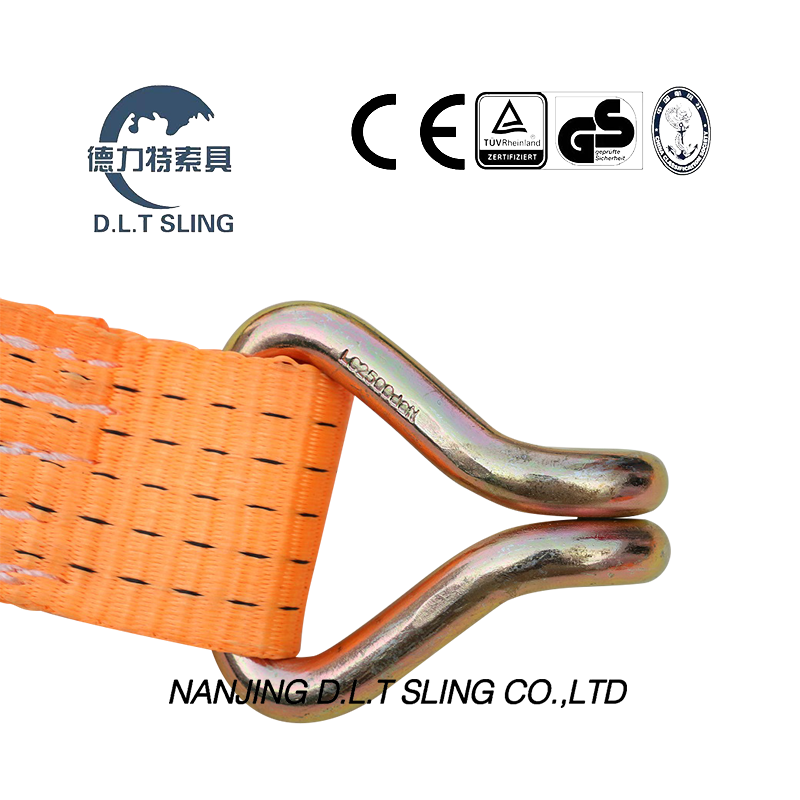
Anchor hardware must match the trailer's tie-down points. A Double J Hook Ratchet Strap is ideal for standard trailer D-rings and side rails, offering superior load distribution compared to single-wire alternatives. Flat hooks work best with flatbed rub rails, while S-hooks suit lighter applications. Matching the hardware prevents point-loading and premature failure.
Using the wrong end fitting creates dangerous stress concentrations. For example, forcing a wide flat hook into a narrow D-ring causes the hook to bear weight on its edges rather than its center. This uneven loading can bend the hook or snap the anchor point under dynamic highway forces. Always verify that the hook seats fully and squarely within the anchor.
The Department of Transportation (DOT) and Federal Motor Carrier Safety Administration (FMCSA) mandate specific load securing formulas. The aggregate WLL of all tie-downs must equal at least 50% of the cargo's total weight. If a load weighs 10,000 pounds, the combined WLL of the straps used must be at least 5,000 pounds. This is a minimum legal requirement, not a maximum safety recommendation.
Experienced operators often exceed this 50% rule to account for extreme braking or evasive maneuvers. When calculating aggregate WLL, only count the WLL of the weakest component in the assembly. If you use a strap rated for 3,333 lbs but attach it to a D-ring rated for 1,000 lbs, the effective WLL for that tie-down point is only 1,000 lbs.
Break Strength represents the absolute breaking point of a new strap under laboratory conditions. The Working Load Limit is the safe operational limit, typically calculated at a 3:1 safety margin. Manufacturers that advertise Break Strength prominently often do so to inflate perceived capacity. Always base your calculations strictly on the WLL tag sewn into the webbing.
If the WLL tag is missing or illegible, DOT regulations require you to remove the strap from service immediately. Inspectors will assign the lowest possible default rating to an untagged strap, which almost guarantees a load securement violation. Protect the tags from abrasion and UV exposure to keep your equipment compliant.
The angle of the strap directly affects downward pressure. A strap pulling at a 90-degree angle provides maximum securing force. A strap at a 30-degree angle provides significantly less downward pressure, requiring additional straps to achieve the necessary aggregate WLL. Evaluate anchor points to maximize the angle of tension.
When securing tall cargo, finding a steep angle becomes difficult. In these scenarios, you must increase the number of straps to compensate for the shallow angle. Never route straps over sharp trailer edges without protection, as the tension will cut the webbing regardless of the angle.
Direct tie-downs attach directly to the cargo chassis. Indirect tie-downs pass over the cargo to press it down to the trailer bed. Indirect methods rely on friction to hold the load. This choice affects overall WLL calculations, as indirect tie-downs generally require more straps to achieve the same securing force.
When using indirect tie-downs, the friction coefficient between the cargo and the trailer deck matters immensely. Wood on wood offers decent friction, while steel on steel is highly slippery. Use rubber friction mats under steel cargo to increase grip and reduce the burden on your indirect tie-downs.
Inspect every strap before use. Discard any strap with cuts exceeding 3/8 inch, melted fibers, severe abrasion, deformed hardware, or missing WLL tags. Using compromised equipment violates safety regulations and risks catastrophic load failure. Run your bare hands along the webbing to feel for stiff spots, which indicate internal dirt buildup or chemical damage.
Secure the fixed end and the adjustable end to appropriate anchor points. Keep the webbing flat and untwisted. A flat strap distributes the load evenly across its width, whereas a twisted strap concentrates stress and reduces the overall strength of the assembly. Ensure the hook opening faces downward or inward so gravity helps keep it seated if tension momentarily drops.
Open the ratchet handle to expose the mandrel slot. Feed the loose end of the webbing through the bottom of the slot. Pull all the slack entirely through the mandrel until the webbing is taut against the cargo. Failing to remove slack leads to over-spooling. The webbing must enter the mandrel straight to prevent it from bunching up against the side plates.
Begin the ratcheting motion by pumping the handle. Follow the "2-3 wrap rule." The webbing should wrap around the mandrel exactly two to three times. This provides enough friction to lock the strap without jamming the mechanism inside the spool. If you hit maximum tension but only have one wrap, release the strap, pull slightly less slack through, and try again.
Bundle and tie off the remaining loose strap end. High-frequency flapping in the wind causes rapid abrasion and structural degradation. Secure the excess webbing tightly to the tensioned strap or the trailer frame to prevent wind damage. You can fold the excess into a tight square and tape it, or use specialized strap clips to keep it contained.
Close the handle completely flat to engage the safety lock. A flat handle prevents accidental release caused by road vibration. Verify the lock is fully seated before moving the vehicle. You should hear a distinct click when the pawl drops into the final locked position.
Secure ATVs, UTVs, or motorcycles by compressing the suspension partially to prevent bouncing. Alternatively, anchor directly to the tires or axles. This allows the vehicle's suspension to work independently of the tie-downs, reducing dynamic shock loads on the straps. When tying down by the chassis, compress the suspension about halfway; fully bottoming out the suspension can damage the vehicle's seals.
Using wheel nets or axle straps is generally preferred for heavy equipment. This method isolates the vehicle's sprung weight. If you tie down the chassis and the vehicle hits a bump, the suspension compresses, the straps go slack, and the hooks can detach from the anchor points.
Use the "choker" strap technique for bundled materials. Wrap the strap 360 degrees around the bundle before anchoring. This prevents the internal friction-slide of middle pieces during sudden stops, keeping the entire bundle unified and secure. Standard over-the-top indirect tie-downs only secure the outer layer of a bundle, leaving the inner pipes or boards free to shoot forward under heavy braking.
Place dunnage (wood blocks) between layers of pipe or steel to increase friction and stabilize the load. Ensure the straps pass directly over the dunnage to clamp the layers together effectively. This prevents the load from bowing or shifting laterally.
Place a single 180-degree twist in the webbing for high-profile loads. This aerodynamic adjustment eliminates wind whistle and high-speed vibration on long highway runs. Do not twist the strap more than once, as excessive twisting degrades load capacity. The single twist disrupts the airflow over the flat surface of the strap, stopping the harmonic resonance that causes violent flapping.
Pull and hold the release lever (pawl) inside the handle. Open the handle a full 180 degrees until it clicks into the flat open position. Allow the tension to pop release. Keep your fingers clear of the gear cogs during this process. The sudden release of tension can cause the handle to snap back violently if you lose your grip.
Always maintain a firm grip on the handle while disengaging the pawl. If the mechanism is stiff, do not use a cheater bar to force it open. A cheater bar will bend the handle or shear the gear teeth. Instead, apply penetrating oil to the moving parts and work the handle back and forth gently.
A tensioned strap stores significant kinetic energy. Position your body out of the direct line of fire when releasing tension. Anticipate potential cargo movement. Loads can shift during transit and may fall once the securing force is removed. Stand to the side of the ratchet, never directly in front of it.
Before releasing any straps, visually inspect the load. If the cargo is leaning heavily against the straps, you must use a forklift or crane to support the weight before releasing the tension. Releasing a load-bearing strap without support will cause the cargo to spill off the trailer.
Straps that have contracted due to rain and temperature drops can lock the pawl mechanism. Apply gentle heat or use a specialized de-icing lubricant to free the gears. Never force a frozen handle, as this can bend the release lever. Ice buildup inside the mandrel slot can also prevent the webbing from unspooling.
If you frequently operate in freezing conditions, spray the ratchet mechanisms with a dry silicone lubricant before the trip. This creates a hydrophobic barrier that prevents water from freezing inside the gear cogs and pawl springs.
Failing to pull the slack through before ratcheting causes a "bird's nest." The webbing builds up, jams the gears, and prevents the handle from opening or closing. This often requires cutting the strap to release the load. Always pull slack through first. A bird's nest occurs because the mandrel runs out of space, forcing the webbing outward against the ratchet frame.
To fix a minor bird's nest without cutting the strap, fully open the handle to the release position. Use a pair of pliers to pull forcefully on the jammed webbing while wiggling the mandrel. This can sometimes free the bound fibers, but it requires significant physical effort.
Sharp cargo edges, such as steel plates or bricks, cut webbing rapidly under tension. The mandatory use of edge protectors or sleeve guards prevents this friction. Use field expedients like heavy carpet remnants if commercial guards are unavailable. Even seemingly dull edges, like the corner of a wooden crate, will saw through a polyester strap under highway vibration.
Edge Type | Risk Level | Recommended Protection |
|---|---|---|
Machined Steel / Sheet Metal | Extreme | Hard plastic corner guards or steel edge protectors |
Concrete / Brick | High | Heavy-duty rubber sleeves or thick felt pads |
Rough Lumber | Moderate | Standard webbing sleeves or carpet remnants |
Straps loosen during the first 50 miles of a trip due to cargo settling and minor webbing stretch. Establish a strict protocol for pulling over and re-tensioning all assemblies shortly after departure to maintain aggregate WLL. Cargo like bagged soil or loose lumber will compress significantly as the trailer bounces down the road.
Make it a habit to check strap tension at every fuel stop or rest break. Pluck the strap like a guitar string; it should have a tight, resonant sound. If it flaps loosely, the cargo has settled, and you must apply more tension immediately.
Wash road grime, salt, and mud out of the polyester webbing using mild soap and water. Dirt particles cause microscopic fiber abrasion inside the strap. Rinse thoroughly and allow the webbing to air dry completely before storage. Never use bleach or harsh industrial solvents, as these chemicals break down the polyester polymers and destroy the strap's load capacity.
For heavy mud, use a medium-bristle brush to scrub the webbing gently. Do not use a pressure washer, as the high-pressure water jet can force dirt deeper into the weave and sever the internal load-bearing fibers.
Apply dry PTFE spray or silicone lubricant to the ratchet gears and springs. Avoid greases or WD-40, which attract dirt and highway grit. Proper lubrication ensures the pawl engages and disengages smoothly without sticking. Wipe off any excess lubricant to prevent it from transferring onto the webbing.
Inspect the main pivot bolt and the pawl spring during lubrication. If the spring is rusted or lacks tension, the pawl will not lock securely into the gears. Replace the ratchet hardware if the spring fails.
Dry-store straps using rubber bands, self-contained rolling methods, or dedicated storage bags. Proper coiling prevents mold, mildew, and tangling. Never store wet straps in enclosed spaces, as this accelerates material degradation. A tangled pile of straps in a toolbox leads to frustration and encourages operators to skip pre-trip inspections.
Roll the strap starting from the loose end, working your way toward the ratchet hardware. Secure the roll with a heavy-duty rubber band or a velcro strap. Store the rolled straps in a ventilated dry box mounted on the trailer or inside the cab.
Audit your current tie-down inventory immediately and discard any straps with frayed webbing or missing WLL tags.
Calculate the aggregate WLL required for your standard loads to ensure compliance with DOT regulations.
Standardize operator training on the 2-3 wrap rule to eliminate jammed mandrels and over-spooling.
Procure end fittings that directly match your transport vehicle's anchor points to optimize load distribution.
A: The DOT requires the aggregate Working Load Limit (WLL) of all straps to equal at least 50% of the cargo's total weight. Additionally, you need one strap for every 10 feet of cargo length, with a minimum of two straps for most heavy loads.
A: A cam buckle relies on user pull-strength to achieve tension, making it suitable for lighter, fragile loads. A ratchet tie down uses mechanical gear advantage to multiply force, providing high tension for heavy-duty cargo securing.
A: Pull the release lever and open the handle completely flat. Pull forcefully on the webbing from the non-fixed side to manually unspool the jammed material. If severely over-spooled, you may need to carefully cut the strap to release the load safely.
A: Double J hooks are designed to attach securely to standard trailer D-rings, side rails, and stake pockets. The double-wire design distributes the load more evenly across the anchor point than a single-wire hook, reducing the risk of hardware deformation.
A: Straps loosen primarily due to the cargo settling, vibrating, or compressing during transit. Additionally, new polyester webbing may experience a minor 1-3% stretch under initial tension. Always stop and re-tension straps after the first 50 miles.
A: Yes, polyester webbing retains its strength when wet and resists water absorption. However, wet straps should be dried completely before long-term storage to prevent mold, and freezing temperatures can cause wet mechanisms to lock up.

