

close
Choose Your Site
Global
Social Media

Views: 0 Author: Site Editor Publish Time: 2026-08-19 Origin: Site


Improper load securement carries severe operational, financial, and safety risks. Catastrophic load shifts or equipment failures during transit can destroy high-value cargo and cause fatal highway accidents. The reality on the ground is that user error during the threading process frequently compromises the hardware. Twisted webbing or over-spooling directly reduces the Working Load Limit (WLL) and accelerates mechanical degradation. You cannot afford to guess when securing thousands of pounds of freight to a flatbed or trailer.
Mastering the correct threading technique for a Ratchet Tie Down is a strict baseline requirement for compliance and safety. Protecting freight requires more than just throwing a strap over a load. It demands a technical understanding of proper usage, hardware evaluation, and mechanical limits. This guide breaks down the exact procedures to thread, secure, and troubleshoot your load securement systems effectively.
Mandrel Alignment is Critical: Proper threading requires aligning the take-up spool (mandrel) slot so the webbing feeds straight through from the bottom, preventing friction wear.
Slack Removal Prevents Jamming: Manually pulling excess webbing through the spool before ratcheting eliminates the "bird's nest" effect, which can lock the mechanism and reduce tension capacity.
Application Dictates Hardware: While a Ratchet Tie Down or heavy-duty Ratchet Lashing System provides maximum tension for heavy freight, a Clamp Buckle Strap is necessary for fragile loads requiring precise, manual tension control.
Inspection is Mandatory: A secure load relies on pre-trip inspections of both the mechanical ratchet components and the integrity of the webbing material.
Users cannot safely operate or troubleshoot a tie-down without understanding how the individual components interact under high tension. A mechanical failure often stems from a fundamental misunderstanding of the hardware anatomy. When you are out in the field, knowing exactly how the gear and pawl interact can save you hours of frustration and prevent dangerous load shifts.
The mandrel functions as the core gripping and winding mechanism for the webbing. You will find the "open mandrel" lower slot located directly at the bottom of the ratchet housing. This center slot must maintain strict mechanical tolerances to prevent webbing slippage under heavy loads. When the strap feeds through this slot, the subsequent rotations lock the material against itself. This creates the friction necessary to hold thousands of pounds. If the mandrel is bent or warped from previous over-tensioning, the strap will not feed evenly, leading to immediate binding.
The handle operates on a gear and pawl mechanism. This design allows for incremental tensioning, giving the operator significant mechanical advantage. The release trigger serves a dual purpose. It disengages the pawl for strap removal and acts as a safety function. When closed, the trigger locks the handle down, preventing accidental release during transit vibrations. A rusted or sticky release trigger is a common point of failure on job sites. Regular lubrication of these moving parts ensures the pawl seats deeply into the gear teeth.
Webbing materials require careful evaluation. Polyester dominates the industry due to its exceptionally low stretch rate and high UV resistance compared to nylon. Nylon stretches under tension, making it unsuitable for rigid load securement. Selecting the correct end fittings dictates your success. J-hooks, S-hooks, and flat hooks must match your specific anchor points. A mismatch between the hook design and the anchor profile causes point-loading, which drastically reduces the effective strength of the assembly.
Material Type | Stretch Rate | UV Resistance | Best Application |
|---|---|---|---|
Polyester | Low (1-3%) | High | Heavy freight, flatbeds, rigid securement |
Nylon | High (5-10%) | Medium | Recovery straps, dynamic towing |
Polypropylene | Medium | Low | Light duty, indoor applications |
Implementing a precise, standardized operating procedure for threading ensures repeatability and safety across all fleet operations. Follow these exact steps to secure the mechanism properly. Skipping a step or rushing the threading process usually results in a jammed spool halfway through tensioning.
Engage the release trigger to open the handle completely flat. You must push the handle to a full 180-degree position. This flat position exposes the take-up spool for unobstructed access. It locks the gears in an open state, preventing the mandrel from rotating while you feed the strap. If the handle does not lay completely flat, the pawl is likely caught on a gear tooth. Wiggle the release trigger until it drops into the fully open position.
Rotate the spool manually so the center slot sits parallel to the base of the ratchet. This alignment represents a point of failure for beginners. If the slot sits at an angle, the webbing will fold and jam during the first rotation. A parallel slot ensures a clean, flat feed. You can usually spin the mandrel with your thumb when the handle is locked open.
Slide the loose end of the strap upward through the bottom of the mandrel slot. Pull the feed end of the strap through to the front about 5 to 6 inches before routing it back. You must slip the webbing cleanly under the ratchet mechanism. This specific routing prevents binding and keeps the strap from entangling with the release trigger during operation. Always double-check that the strap is not twisted before feeding it through the slot.
Pull the webbing taut by hand until the load is lightly engaged. You must remove all excess slack before pumping the handle. The ratchet should only wind 2 to 3 layers of webbing to achieve maximum tension. Winding more than three layers fills the spool capacity, causing the strap to jam against the housing and preventing proper tensioning. This is the most common error seen on loading docks.
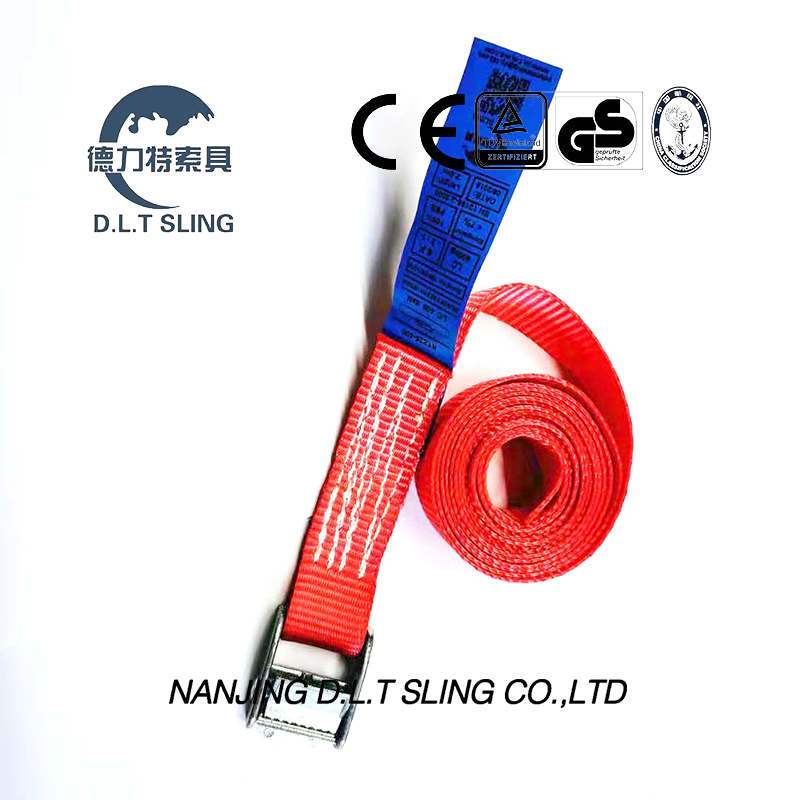
Non-ratcheting friction straps require a different operating procedure. Establishing a parallel standard operating procedure prevents operator confusion between the two distinct mechanisms. These are simpler devices but require equal attention to detail to prevent slippage.
Press the spring-loaded thumb lever located on the back of the hardware. Depressing this lever opens the integrated clamp teeth. You must hold this lever down completely to allow the webbing to pass through without snagging. If the spring feels weak or the teeth do not fully retract, the hardware needs replacement.
Insert the strap through the bottom or backside of the buckle. Feed the material directly through the open teeth mechanism. Ensure the strap remains completely flat. Any twists introduced at this stage will prevent the teeth from gripping the webbing uniformly. A flat strap ensures maximum surface area contact with the clamping mechanism.
Release the thumb lever to engage the teeth. The spring mechanism will bite down on the strap, creating a friction lock. Pull the loose end manually to achieve the required tension. Because this system lacks mechanical leverage, you rely entirely on physical pulling force to secure the load. Lean your body weight into the pull for heavier items, but avoid jerking the strap.
A successfully secured load requires proper tensioning and strict adherence to locking protocols. Safe disengagement is equally important to prevent operator injury. The energy stored in a fully tensioned strap can cause severe injury if released improperly.
Pump the handle in a ratcheting motion to achieve the required tension. Watch the cargo carefully as you apply force. The strap is adequately tight when it firmly holds the item without crushing the cargo edges or bending the anchor points. Over-tensioning damages freight and stresses the hardware beyond its design limits. Listen to the cargo; creaking or groaning usually means you have applied too much force.
You must close the handle completely flat to lock the gears. This is a mandatory step. DOT and FMCSA compliance standards require all mechanical securement devices to be fully locked during commercial transit. An open or partially closed handle can vibrate loose, releasing the load entirely. Always give the handle a firm tap to ensure the pawl is seated.
Pull the release trigger and open the handle a full 180 degrees. Pull the webbing free from the spool. Address the risk of sudden tension release by positioning your body away from the direct line of force. High-tension straps can snap back violently. Keep your face and hands clear of the handle's trajectory when disengaging the pawl. Wear heavy leather gloves to protect your hands from pinch points.
Choosing the correct hardware depends entirely on load requirements, tensioning capabilities, and cargo fragility. Applying the wrong tool guarantees failure. You must match the equipment to the specific demands of the freight.
Specify a Ratchet Lashing System for heavy-duty, industrial, or commercial freight. The mechanical advantage of the ratcheting gear allows operators to achieve exceptionally high Working Load Limits. Use these systems for securing heavy machinery, construction materials, and dense pallets where maximum downward pressure is required. They are the standard for flatbed transportation.
A Clamp Buckle Strap utilizes a friction lock via spring-loaded teeth. Position this solution for light-duty applications or fragile cargo. Dirt bikes, glass transport, and antiques require manual tension control. Over-tensioning these items with a geared ratchet poses a severe risk of structural damage. The manual pull limits the maximum force applied to the cargo.
Evaluate the speed of deployment versus ultimate holding power. Clamp buckles deploy rapidly and release instantly, making them ideal for quick, light loads. Ratchet systems take longer to thread and tension but provide the uncompromising holding power necessary for highway transport and heavy industrial applications. Your choice dictates both the safety and efficiency of the loading process.
Operational realities and daily wear-and-tear routinely compromise load security. Mitigating these risks requires active troubleshooting and strict maintenance protocols. Ignoring minor hardware issues leads to major failures on the road.
Failing to remove slack leads to excess webbing on the spool. This creates a "bird's nest" that jams the gears and prevents the handle from closing. The mitigation strategy is simple. Unspool the mechanism entirely, remove all slack manually by pulling the tail end, and re-tension the strap with only 2 to 3 wraps on the mandrel. Never try to force a jammed handle closed.
A twist in the strap reduces the WLL significantly. It concentrates the entire stress load onto a narrow section of the webbing rather than distributing it evenly. This uneven stress causes rapid edge wear and abrasion. Always ensure the strap lays perfectly flat across the cargo and through the mandrel. Use edge protectors on sharp cargo corners to prevent the webbing from slicing under tension.
Implement a strict pre-use inspection checklist. Check for frayed webbing, rusted gears, and bent mandrels. UV exposure degrades polyester over time, making it brittle. Retire a tie-down from service immediately if you observe cuts exceeding 10% of the strap width, broken stitching, or any deformation in the metal hardware. Keep your gear out of direct sunlight when not in use to extend its lifespan.
Failure Mode | Visual Indicator | Required Action |
|---|---|---|
Edge Cut | Severed fibers on strap edge | Remove from service immediately |
UV Degradation | Faded color, stiff/brittle texture | Replace strap |
Gear Jam | Handle will not close flat | Unspool, remove slack, re-thread |
Bent Mandrel | Spool wobbles during rotation | Discard hardware |
Proper threading dictates the performance and reliability of the tie-down. It is a safety protocol, not merely a functional necessity. Choosing between a standard ratchet, a heavy-duty lashing system, or a cam buckle depends entirely on your load weight and fragility. Take the time to train your crew on these exact procedures to eliminate the guesswork from load securement.
Audit your current load securement equipment to identify frayed webbing or rusted hardware.
Implement standardized threading training for all operators handling freight.
Upgrade damaged or aging straps to certified, high-WLL hardware to ensure highway compliance.
Establish a mandatory pre-trip inspection routine for all tie-down components.
A: You should only wrap 2 to 3 layers of webbing around the spool. This provides optimal tension without overfilling the mandrel, which prevents the gears from jamming.
A: Straps usually stick due to over-spooling, rust, or tension lock. Apply penetrating oil for rust. For tension lock, pull the release trigger fully and forcefully push the handle perfectly flat to disengage the pawl.
A: It is not recommended. The mechanical advantage of a ratchet can easily crush fragile items. Use a cam buckle strap instead, which relies on manual pulling force for precise tension control.
A: Break strength is the exact weight at which the strap fails and snaps. The Working Load Limit (WLL) is the maximum safe operational weight, strictly rated at one-third of the break strength.
A: Put a single half-twist in the free-spanning section of the webbing. This simple twist disrupts the aerodynamics and stops the strap from vibrating and damaging the cargo edges.
A: Replace straps immediately when you see visible wear indicators. Look for cuts, burn marks, missing stitch patterns, or any bent, rusted, or deformed metal hardware.

